This step-by-step guide is to show you the basic skills of how to rip blu ray disc to high-definition or general video files with ImTOO Blu Ray Ripper.
Before you start, please download, install and launch ImTOO Blu Ray Ripper.
For your convenience, this guide is divided into 3 parts:
Part 1: Getting Started
Part 2: Clip Video File
Part 3: Edit Video Effect
Part 1: Getting Started
Step 1: Load blu ray disc
Insert a blu ray disc, and click "Add Blu Ray Folder" button on the toolbar, then select the inserted disc in the dialog box that opens. All the titles in the disc will be displayed in the file list as below.
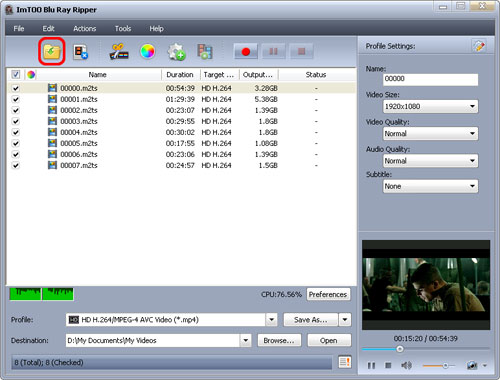
Step 2: Set destination
Click "Browse" button at the bottom of the window, and select a folder as "Destination" to save the output files on a designated folder.
Tip: Click "Open" button to check the output files directly after ripping is done.
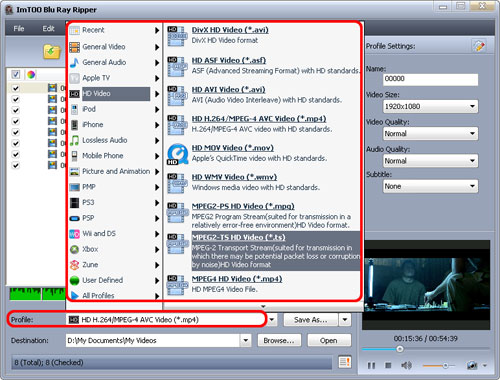
Step 3: Select output format
Select one or more files in the file list and click "Profile" drop-down button, then select an output format for the selected files in the drop-down list that opens. You can also set different formats for different files.
Tips:
1. If you're not satisfied with default profile settings, you can adjust them on the right "Profile Settings" panel to make the output files fit your need.
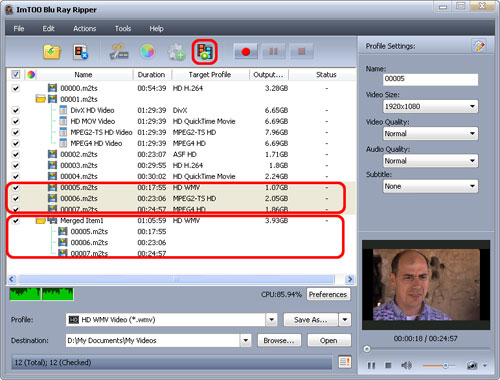
2. Click "Add Profile" button, then an extra profile will be added under the previous profile. Select the newly added profile item, click "Profile" drop-down button and select a new profile from the list. This way, you can output multiple files from the same source file.

3. Click "Tools>Bitrate Calculator" to open "Bitrate Calculator" dialog box. Enter the file size you want and optionally set audio bit rate to compute the video bit rate promptly. Click "OK" to return to the file list, then you'll find that the file size and bit rate will appear respectively in the file list and settings panel.

4. The software provides you the possibility of merging multiple files into a single one. Select all files needed to merge in the file list and click "Merge" button on the toolbar, then all the selected files will be merged into one file and added to the file list.
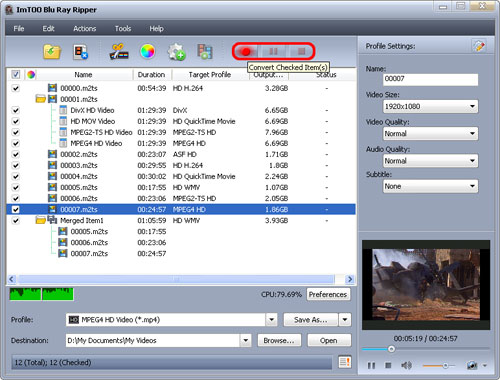
Step 4: Rip blu ray disc
After the above settings, check the needed files to rip in the file list, and click "Convert Checked Item(s)" button on the toolbar to start ripping. You can check the ripping progress from the progress bar at the bottom of the window.
Tips:
1. If you want to clip your video file and edit its effect before ripping, please refer to Part 2: Clip Video File and Part 3: Edit Video Effect.
2. Before ripping, you can preview any file from the right-bottom player: select a video file in the file list, click Play button in the player.
When the video plays a certain scene you like, click Snapshot button to store the image in the snapshot folder. You can set the snapshot folder by clicking "Change Snapshot Folder" option from "Settings…" drop-down list and selecting the snapshot folder you want in the dialog box that opens.
3. You can click "Pause Checked Item(s)" button to make the ripping process pause and "Stop Checked Item(s)" button to cancel the process as required.
4. If you have other more important applications running, click "File> Run Background" option to run the software in the background.
Part 2: Clip Video File
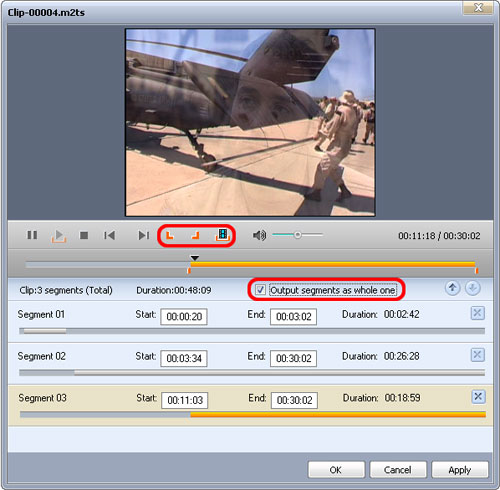
The software allows you to clip video file to extract all the segments you want and output them respectively or as a whole one.
Step 1: Select a video file in the file list, click "Clip" button on the toolbar to open "Clip" window.
Step 2: Click "Play" button to play the video file. When it comes the point you want, click "Set Start Point" button to set it as the start point and set end point in the same way, then the segment you want will be displayed in the segment list below.
Step 3: Click the "New Clip" button to create a new segment in the segment list, then repeat the Step 2 to set its start and end point. Repeat this step to clip as many segments as you want.
Step 4: Check "Output segments as a whole one" checkbox and click "OK" button, then a new file including all the segments will be added into the file list. Or if you don't want to merge them, then uncheck "Output segments as a whole one" checkbox, click "OK" button and add all the segments into the file list.
Part 3: Edit Video Effect
The software offers video editing tools to help you change the video effect.
Before editing, select a video file you want and click "Effect" button on the toolbar to open "Effect" window.
1. Crop
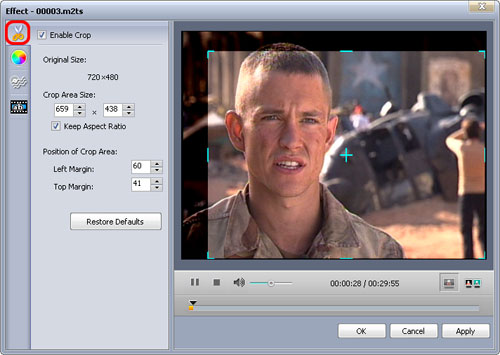
Step 1: Click "Crop" button on the left of the "Effect" window to open "Crop" setting page. The "Enable Crop" option is checked by default.
Step 2: Enter the width and height below the "Crop Area Size" label and check "Keep Aspect Ratio" option as required to set the crop area size, and enter the "Left Margin" and "Right Margin" to set the position of crop area.
Tips:
1. You can also adjust crop area by dragging the central and surrounding handles in the image to adjust the crop area.
2. If you don't want to apply the crop settings to the video, then uncheck "Enable Crop" option.
3. Click "Restore Defaults" button to restore the crop settings to default.
2. Effect
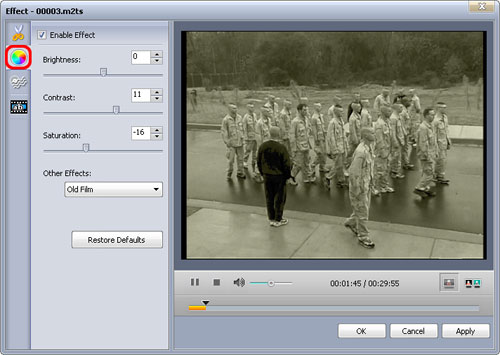
Step 1: Click "Effect" button on the left of the "Effect" window to open "Effect" setting page. The "Enable Crop" option is checked by default.
Step 2: Drag the sliders below the "Brightness", "Contrast" and "Saturation" or enter the values you want to respectively set the brightness, contrast and saturation.
Step 3: Open "Other Effects" drop-down list, select an effect you favor to apply to your video.
Tips:
1. If you don't want to apply the effect settings to the video, then uncheck "Enable Effect" option.
2. Click "Restore Defaults" button to restore the effect settings to default.
3. Watermark
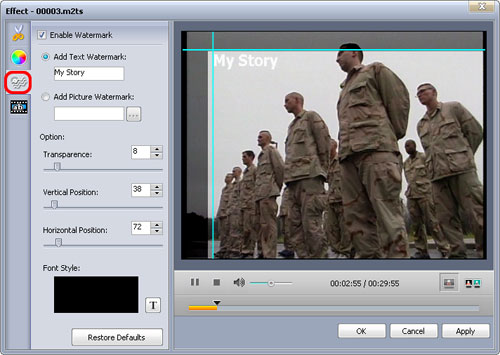
Step 1: Click "Watermark" button on the left of the "Effect" window to open "Watermark" setting page. The "Enable Watermark" option is checked by default.
Step 2: Select "Add Text Watermark" option and enter the text you want as the watermark in the textbox below the option. Or if you want to add picture watermark, then select "Add Picture Watermark" option and select a picture in the dialog that opens as the watermark.
Step 3: Drag the sliders below the "Transparency", "Vertical Position" and "Horizontal Position" options or directly enter the values in the corresponding textboxes to respectively set them. And enter the width and height below the "Watermark Size" option and check "Keep Aspect Ratio" option as required to set the watermark size.
Tips:
1. You can also adjust the watermark position by dragging the vertical & horizontal line displayed on the watermark in the preview window.
2. If you don't want to apply the watermark settings to the video, then uncheck "Enable Watermark" option.
3. Click "Restore Defaults" button to restore the watermark settings to default.
4. Subtitle
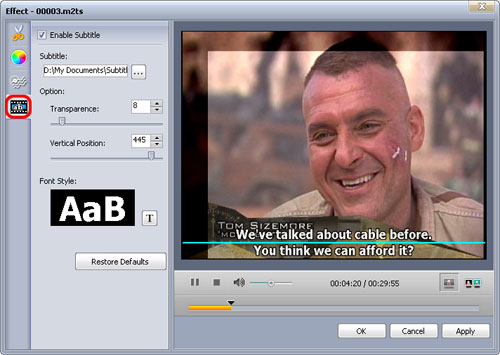
Step 1: Click "Subtitle" button on the left of the "Effect" window to open "Subtitle" setting page. The "Enable Subtitle" option is checked by default.
Step 2: Drag the sliders below the "Transparency" and "Vertical Position" options or directly enter the values in the corresponding textboxes to respectively set them.
Tip: You can also adjust the vertical position of the subtitle by dragging the horizontal line displayed on the subtitle up and down.
Step 3: Click "Settings" button below "Font Style" label to set the font style.
Tips:
1. If you don't want to apply the subtitle settings to the video, then uncheck "Enable Subtitle" option.
2. Click "Restore Defaults" button to restore the subtitle settings to default.
5. Compare
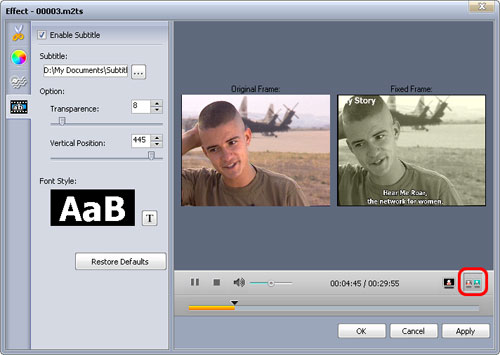
Click "Comparing Preview" button below the preview window, then the original frame and fixed frame will be played at the same time in the two parallel preview windows.

No comments:
Post a Comment